SealPoint’s QuickBooks integration allows you to connect your QuickBooks account and keep job-related accounting information connected with the system you already use to manage your business.
Organization administrators can connect QuickBooks directly from My Organization. During setup, you’ll authorize the connection and select how information from SealPoint should be associated with the accounts already configured in QuickBooks.
While the integration is connected, SealPoint will automatically create a multi-line journal entry in QuickBooks for each job marked Paid.
Note: Every business may have its QuickBooks account structured differently. The account selections shown in this article are examples only and may not be the appropriate selections for your business.
Accessing the QuickBooks Integration
From the top-right user menu, select My Organization.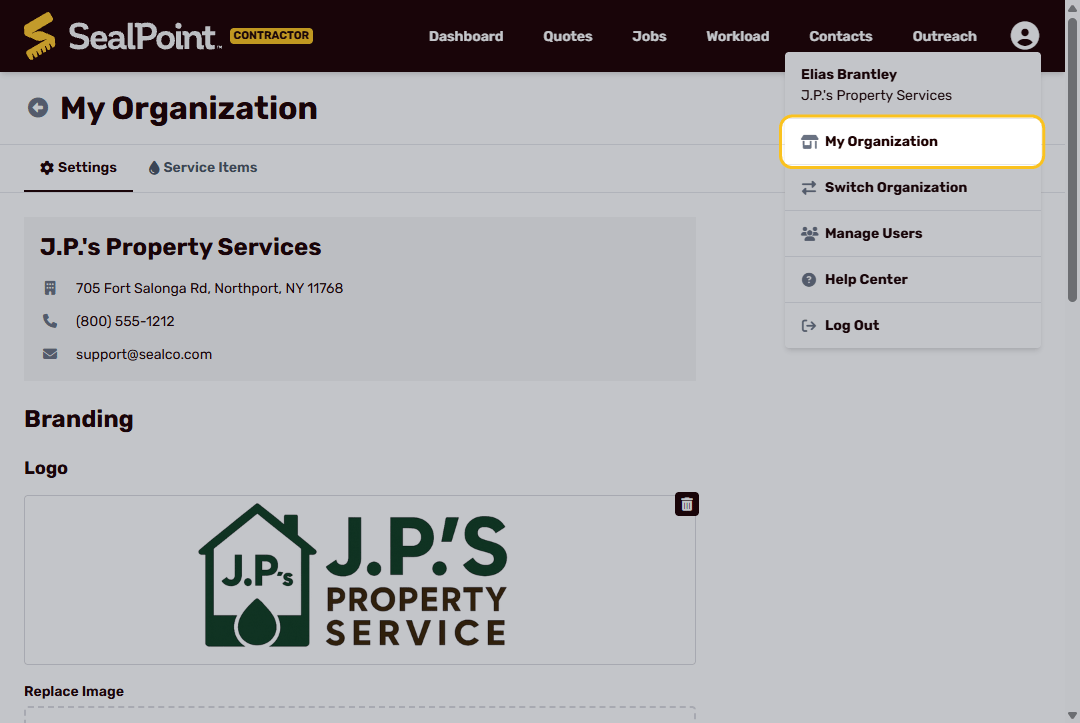
Scroll to the Billing section of the Organization Settings page. Under QuickBooks, select Connect QuickBooks to begin.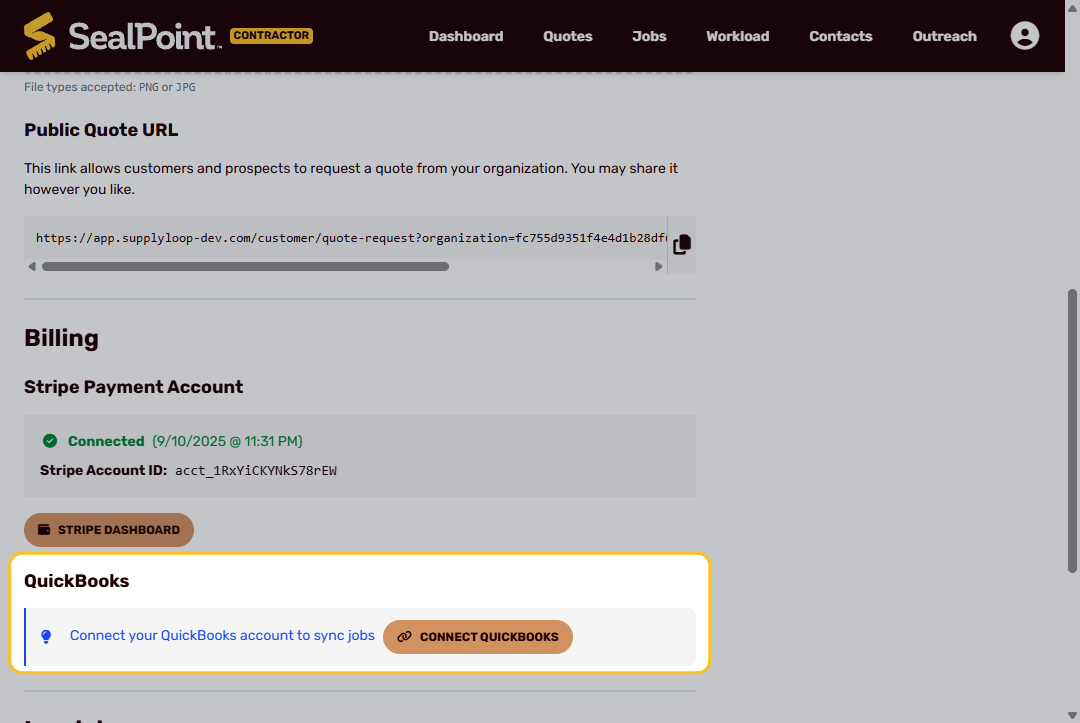
You will be directed through the QuickBooks connection process. Depending on your QuickBooks account, you will be asked to sign in, select your company, or authorize SealPoint to connect to your QuickBooks account.
Once the connection is authorized, you will automatically return to SealPoint to complete the configuration.
Configuring Your QuickBooks Accounts
After QuickBooks is connected, the QuickBooks Settings window will appear.
Here, you’ll select the QuickBooks accounts that correspond with the different types of activity being recorded from SealPoint.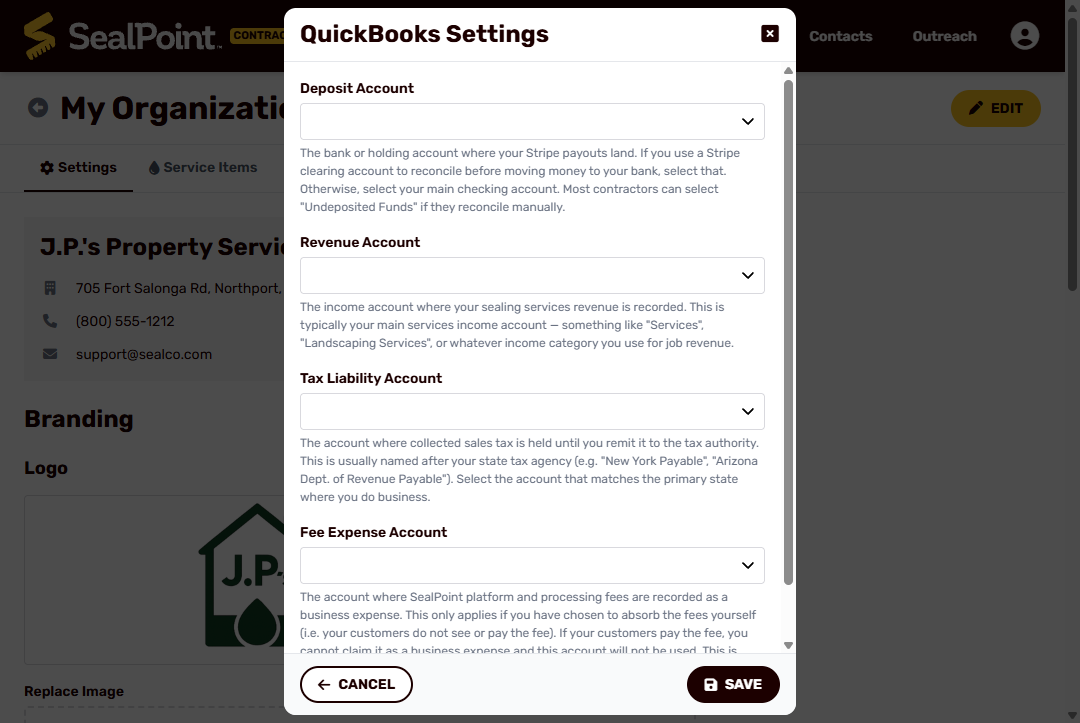
The available options in each dropdown are based on the accounts configured within your connected QuickBooks account.
You will be asked to configure:
• Deposit Account – Select the bank or holding account where your Stripe payouts are deposited. If you use a Stripe clearing account to reconcile payouts before they reach your bank, select that account. Otherwise, this will typically be your primary checking account
• Revenue Account – Select the income account where revenue from your SealPoint services should be recorded. This is typically the primary income account you use for your services, such as Services or another revenue category used by your business.
• Tax Liability Account – Select the account where collected sales tax is held until it is remitted to the appropriate tax authority. This is typically a liability account associated with the state or tax authority where you do business.
• Fee Expense Account – Select the expense account where SealPoint platform and payment processing fees should be recorded when your organization chooses to absorb those fees. If the customer pays the fee, this account will not be used. This is typically an expense category such as Bank Charges, Dues & Subscriptions, or a similar account.
Choosing Your Accounts
Select the appropriate account from each dropdown based on how your business is configured in QuickBooks.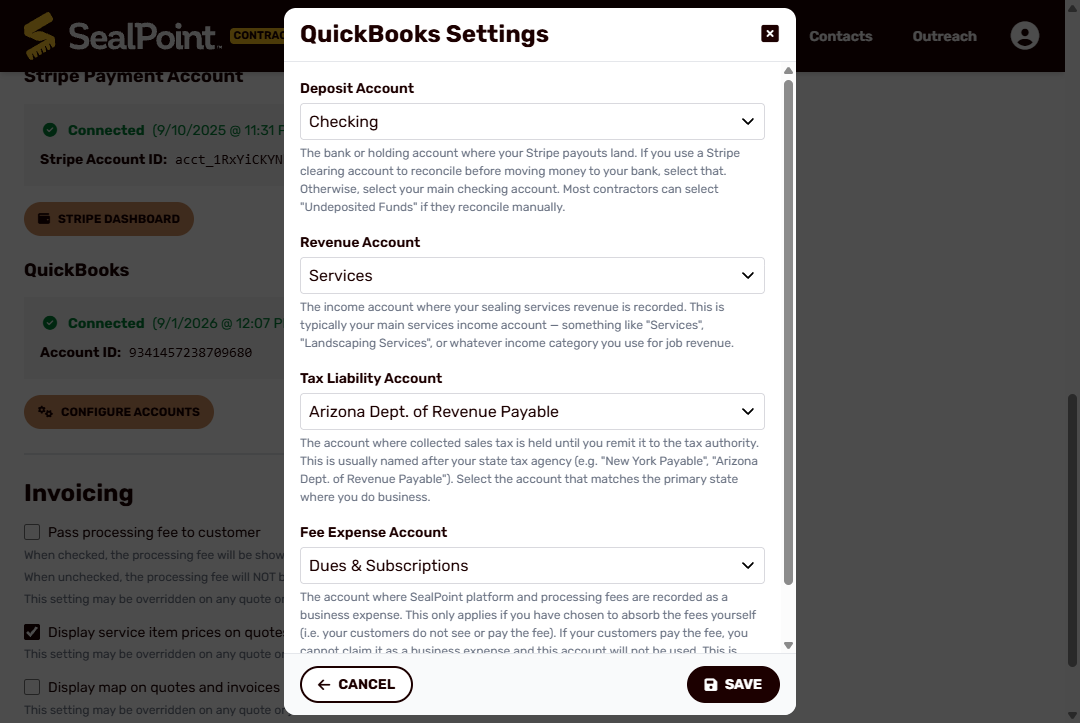
Important: The accounts selected in the examples throughout this article are for demonstration purposes only. Account names, accounting methods, and configurations can vary from one business to another.
SealPoint does not determine which QuickBooks accounts your business should use. If you are unsure which accounts should be selected, we recommend reviewing your existing QuickBooks setup or working with your accountant or bookkeeper.
This setup is focused on connecting SealPoint to the accounting structure you already use rather than changing how your business handles its accounting.
Saving Your QuickBooks Settings
After selecting the appropriate accounts, review your selections and choose Save.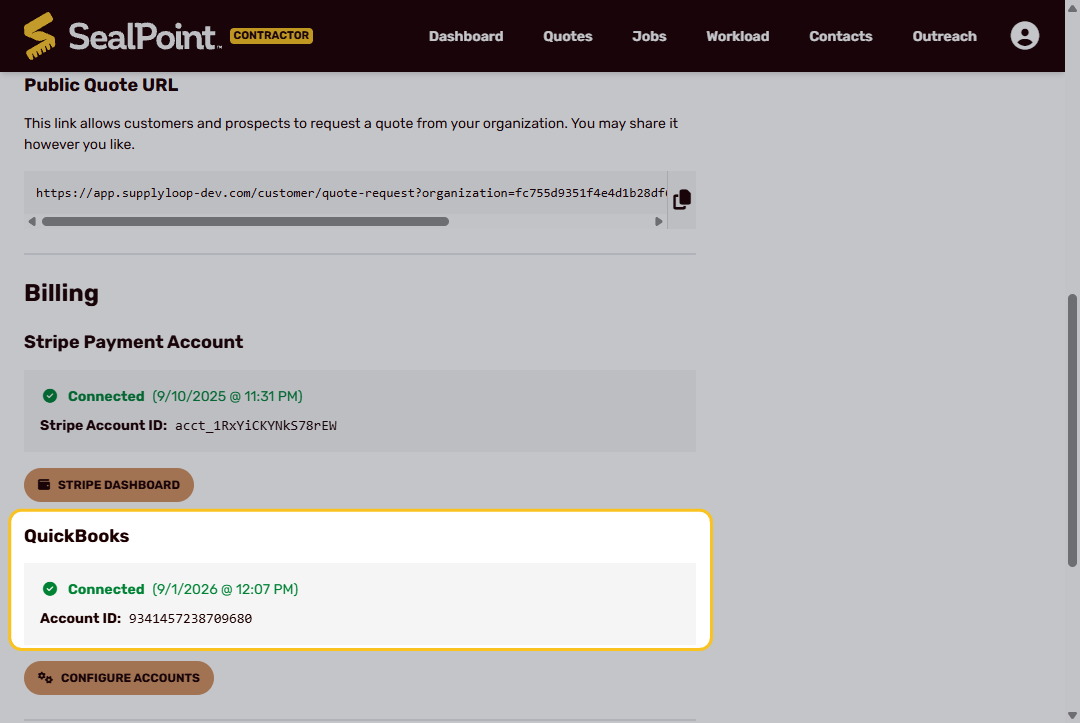
Once saved, you will return to the Organization Settings page. The QuickBooks section will display a Connected status confirming that the integration has been successfully established.
Updating Your QuickBooks Configuration
If you need to change your account selections later, return to:
My Organization → Billing → QuickBooks
Select Configure Accounts to reopen the QuickBooks Settings.
You can review or update your account selections and select Save when finished.
If changes are being made to your QuickBooks account structure, it may be helpful to confirm the updated selections with your accountant or bookkeeper before changing the configuration in SealPoint.
Summary
Connecting QuickBooks to SealPoint allows you to link your SealPoint activity with the accounting structure you already maintain in QuickBooks. Once the connection is authorized, simply map the appropriate deposit, revenue, tax liability, and fee expense accounts and save your configuration.
Because every business can organize its QuickBooks accounts differently, the selections used during setup should reflect your own accounting practices. If you have questions about connecting QuickBooks to SealPoint or experience an issue with the integration, contact support@getsealpoint.com for assistance.
Was this article helpful?
That’s Great!
Thank you for your feedback
Sorry! We couldn't be helpful
Thank you for your feedback
Feedback sent
We appreciate your effort and will try to fix the article